Showing posts with label patterns. Show all posts

Wednesday, 23 August 2017

And Now For Something Completely Different

:: cue Monty Python theme music ::
ni julep by yours truly
Having, um, ‘invested' in rather a lot of self-striping yarn recently, I decided it was time for another pair of socks. Or three. I'm still rather a stickler when it comes to knitting other peoples' patterns. Or perhaps I'm overly fussy? I'm not quite sure what it is, but I'm always thinking if I'm going to knit something, why not design it myself? 

Ah, you know what it really is? I must be living up to my Scottish heritage by never handing over any hard-earned cash for something I could do myself for free! Heh!
ni julep by yours truly size medium
knit picks
 felici sock in ‘mint chip'
schachenmayr regia 4-fädig 4-ply solids in borke'
The blurb:
“We want... a shrubbery!!" 
Technically this pattern is a mix of my Traffic Island socks, and my Twist of Citrus socks; a little bit of feather and fan, and a little bit of chevron knitting, and was originally meant for self-striping yarn. I was going to call it something mint julep-y as the eyelet pattern looks rather Lamiaceae-y, but on working a non-stripey version I got to thinking that it looked like a shrubbery was working up the leg!! Shrubberies, in fact, with a little pathway running down the middle of them! 
And a socktail was born! Or poured and knocked over, maybe!*
Ni Julep is an easy toe-up, Fish Lips Kiss Heel sock that works with all yarn colouring from self-striping to solid!
ni julep by yours truly size large
ice yarns
 mohair magic glitz in 
green shades brown shades'
From mid-calf to short socks, too!
ni julep by yours truly size small
yarning yenta
 sock in 
red fraggle'
holiday yarns flock sock sock in bloody mary mix'
The sock starts at the toe, with my favourite cast-on, the Turkish Cast-On for Toe-Up Socks. You can, of course choose your own favourite cast-on should my favourite not be your favourite! 


yes, yes, there's a gap in the cast-on. 
it is now a design element!
For my small and medium versions (the Red Fraggle, and Mint Chip colourways) I chose to have a contrasting toe, heel, and in the former, cuff as well, as I like how they look with blocks of colour breaking up the stripes. My large version (Green Shades Brown Shades... hmmm, Ice Yarns may need some help in creating enticing colourways names...) is knit straight from toe to cuff using the slow(ish) colour changing yarn. Of course, you can have contrasting heels and toes for plain socks, too. Because you can!

The pattern itself is nice and easy - a 9-row repeat that is very easy to memorise.

I used the marvellous Fish Lips Kiss pattern for the heel. I shall extol the utter delights of this heel until I reach well past my extolation date. No, it's not a free pattern. (Why should you pay a dollar for a heel pattern? Because it is seriously up there with the best fitting heels EVER!) No, I am not affiliated with the pattern or said pattern's designer. No, I'm not telling you you can only use this heel. There are many, MANY heels of which you can choose your own favourite to use in this sock pattern. I would, however, suggest most keenly (reminder to self: do not binge-read Jane Austen when working on writing blog texts) that, if you do prefer using a different heel, to choose one that keeps to the general form. So, peasant/afterthought, or a nice short-row heel will do just the trick.

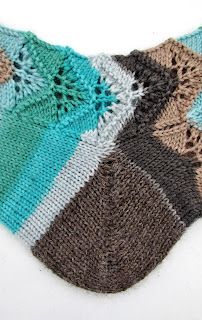

The leg, as you would expect, continues upwards with the shrubbery pattern and once you get to the start of the cuff (roughly 2 inches before the total length you prefer) you have 2 options: the first is to continue with the cuff pattern as written (as in the medium version), or switch to a simple twisted rib (where you knit one stitch through the back loop to, yup, you've guessed it, twist it, then purl one stitch) to the length of cuff you prefer. If you're working the shrubbery cuff, I'd recommend doing 2 repeats. For the twisted rib, I'd work it for 2 inches.


And to finish up, I'm a great fan of Jeny's Surprisingly Stretchy Bind Off, a lovely video tutorial of which I'll post below. It's simple, stylish, and does what it says on the tin!


So, there it is! Ni Julep socks! And how much am I going to be asking you for this little gem? ABSOLUTELY NOTHING!! NOTHING AT ALL! 
TIS FREE!! WHEEEEEEEEEEEEEE!!

Okay, okay. I'm calm. Of course, Ravelry (to where you will be whisked if you click the button below) don't have a FREE, WHEEEEE button, so you'll have to put up with the BUY NOW clicky effort. However, as I think you may have guessed by now, there will be no actual buying involved!


Or, of course, you can click THIS LINK which will take you straight to the pattern page on Ravelry, so you can have a jolly good gander before you inevitably add the pattern to your queues!! 

MWAHAHAH!


* If you don't know (AND WHY NOT????) The Knights Who Say Ni are fictional characters from the film ‘Monty Python and the Holy Grail'. For King Arthur to pass by the Knights Who Say Ni (“ni") he is instructed to find them a shrubbery. A nice one, and not too expensive. They return with a shrubbery (the laurels of which are particularly appreciated) but instead of being let past, Arthur and his knights must find... ANOTHER SHRUBBERY, to place by the one they brought already, only slightly higher to get a two-layer effect with a little path running down the middle...


Saturday, 24 June 2017

Her Grace, Mary, Queen of Scots

...bids you come and have a gander at these...

mary, queen of socks, by yours truly
The blurb:
Mary, Queen of Socks is a companion pattern to Gloriana (my socks inspired by Elizabeth I) and is another design in the series inspired by costume and clothing through the ages. The main beaded motif is an adaptation of embroidered embellishments seen on the gown of a 12- or 13-year-old Mary in a sketch by Clouet c.1555, and the cabled eyelet pattern running parallel to the main motif is a nod towards the famous six ropes of black pearls given to Mary for the occasion of her first marriage (pearls that were coveted, then owned by Elizabeth I). 
This is a toe-up, beaded, lace, and cable sock, with a Fish Lips Kiss Heel, and comes in four sizes from small to XL.
black version: the knitting goddess UK 4-ply sock 75/25 in ‘onyx'
and holiday yarns flocksock sock in ‘bloody mary mix'
white version: ice yarns freddo aplpaca lux in ‘silver white'

The main pattern is worked in one colour, and for this version I chose a cream and silver yarn as a nod towards the opulent gown in the Clouet portrait, but my second version used an onyx yarn to represent the colour Mary was known to wear continuously after the death of the first husband. The chains or red that I chose at the side are a not to the (possibly apocryphal) tale that before her beheading, Mary disrobed her customary black to reveal a crimson under-gown - the colour of Catholic martyrdom.

The centrepiece of the sock design is adapted from the gold embroidery found on the 12- or 13-year-old Mary's dress in a portrait by Couet c.1555,


and is flanked by two rows of stylised pearls representing the famous six strings of black pearls given to Mary on her wedding day to Francois, dauphin of France, by Catherine de Medici. These are described as “six cordons of large pearls, strung as paternosters [...] These are for the most part like black muscades (grapes)." You can see one of these strings in a portrait after Clouet (below), and if you want to see all six worn together, check out Elizabeth I in the Armada portrait!


The cables represent something a little more sinister - bindings for captivity, and in my onyx version, showing the colour of the under-dress Mary is reported to have worn under the black satin dress she wore for her execution - crimson red, the colour of blood and Catholic martyrdom.


The sock starts at the toe (with a nice easy cast-on like the Turkish cast-on that I used) where the square motif and pearls are introduced early on:

Knowing my horrifying way with yarn-overs at the best of time, you will no doubt be very impressed with this little effort! I always try to end up working towards my own strengths, or trying to cover up my weaknesses in my own patterns, and I think not shying away from my ancient yo adversary in this instance has... helped. Well, you can see the pattern I was aiming for, at least. I call this a WIN in my book. Or at least a draw!

You have the option to add a bead at the mid-point of the cross in the square part of the main motif, but if you prefer to keep the eyelet pattern complete throughout, or only add beads to the leg of the sock, there's an option for that in the pattern.

I chose the wonderful Fish Lips Kiss heel again, as it just seems to work. Like I said in my Shirley Temple Socks post, I've never made such a well-fitting sock! You do have to pay $1 for the heel pattern, but I will continue to laud it to the heavens and say that I think it'll be the best sock-related $1 you'll ever spend!

The leg section gives a bit of lee-way regarding where you start the pattern at the back. The directions for the heel (which I can't really divulge here, per the instructions of the heel pattern's designer) is to continue after the construction with another inch or stockinette stitch before carrying on with the pattern up the back of the leg. 

Well. You can see above that in the white version (above) I started the ‘pearl' pattern at the first crossover immediately after the heel (on the same row as the front) but didn't start the main motif pattern until I hit the first round of the internal beaded square. In fact, I did the start of this motif in exactly the same way I started the toe, just with the correct amount of stitches either side! But how and where you start is completely up to you, as long as you're working the same round as the front!


The onyx version continued the pearl motif at the same point as the white version (at the first crossover of the ‘pearl' pattern) but waited an inch to start the main motif, which I began at round 1 when I reached it at the front.

I chose to start the colour-work section at the first bind stitch after the heel, and using 2 balls of the contrasting colour, one for each side, I slowly worked the chain cable. The key is to keep the yarn taut, but not too taut. I have one tester who decided to work the entire bind section from the toe to the cuff in a contrasting colour, with a couple of changes to stitch placement on the sole (details on the link to the project HERE), and the effect is also pretty special.

And that's pretty much it. The cuff is more of a recipe than an actual set of instructions; basically you continue the knit stitches as twisted knit stitches, the purls and yo's as purls, and the bind cable as the rest of the sock, but without the cables. Simple!


For the white version I stopped after row 10 and continued:
p1, (ktbl, p2) x2, B3 (or k3 depending on which round you're on), p2, B3/k3, p2, ktbl, p2, ktbl, p1, ktbl x2, (p1, ktbl) x3, p1, ktbl x2. 
and for the onyx version I stopped on round 24 and continued: 
p1, (ktbl, p2) x2, (k3/B3, p2) x2, ktbl, p2, ktbl, (p1, ktbl) x4.
for about an inch and half or so, binding off with a nice stretchy stitch - I used Jeny's Suprisingly Stretchy Bind Off, but feel free to use your favourite! Of course, you are free to stop the leg for the cuff any place you want, but if you want to keep the wider bind stitches apart, then I'd suggest stopping either between rounds 8 to 12, or rounds 20 to 24. You'll see what I mean if you buy the pattern!


And talking of buying... (see how nicely I slipped that in there??) you can, you can!! and all you need to do is click THIS LINK which will take you to the pattern page on Ravelry (of which you don't need to be a member if you want to buy any patterns there) or you can click the link below which will take you straight to the PayPal page, where you will be asked to part with a paltry €3 (or £2.62. or $3.34 at current exchange rates, plus VAT should you live in the EU) to have the royal pattern in your grasp!


Go on, you know you want to!


With thanks to my Intrepid Ravelry Testers™ ChocolateKate, confiance, crochestist, KnittingNightElf, knotginaj, Mimmyknits, MooseJean, Naehall, Purple TX, renater59, sharpei4kris, SitNKnit, Skalman277, and TigerSharkknits.

Tuesday, 4 April 2017

On The Good Ship Woolly Sock

My goodness, but it's been a while! But in my defence I hadn't been near any sticks and string for a while, too... Yup, as defences go, that's quite the lamest you'll hear for a while, but maybe this will appease the yarn gods for a wee bit... 

My first published pattern in a couple of years, may I present:

Shirley Temple Socks

shirley temple socks by yours truly in angels and elephants 
hand-dyed knitting wool - sock/4-ply in ‘pentillie'
The blurb:
A Shirley Temple cocktail is in fact a mocktail of ginger ale, a splash of grenadine, and topped off with a maraschino cherry garnish, said to have been invented to serve to the child actress at Hollywood events...
The Shirley Temple sock pattern itself is another in my theme of alcoholic drinks, but in a happy twist of fate, it also manages to blend neatly into my other theme of costumes through the ages... Bubbles from the ginger ale, plus a nod to the curls for which Shirley Temple was known!
Yes! Socks! In three different sizes, so less!!
shirley temple socks by yours truly in namolio pure wool in ‘oranges'
I'll be honest - these cuties began their journey back in 2013 when I first put scribbled curls to paper, but were put on the back burner when I discovered I didn't hate shawls nearly as much as I used to. :: a gazillion shawls later :: Not nearly as much! 

Looking back, I originally envisioned these as cabled socks with no eyelets in sight (sorrynotsorry) but my naive cable brain couldn't quite get a good swirl going that didn't appear more like the end result of drunken yarn brawl instead of the innocent non-alcoholic little girl curl that I was aiming for.

Eyelets it was. And yes, it was easy enough to make the pattern in eyelets, but it took a while to get the decreases just-so, again just to steer away from the yarn brawl. I got there in the end, but wasn't content just to leave it *there*, I decided that this sock needed to be a mirror pattern! I think my brain was trying to make up for the fact that it had been beaten temporarily knocked-back by the dastardly cables...

So what do we have, then? 

A sock worked from the toe-up, incorporating cute little faux eyelet cable ginger-ale bubbles that fizz up the sides of the socks, an excellent new (for me) heel called the Fish Lips Kiss Heel, and scrolling curls that swirl all the way up from toe to cuff.

A simple cast-on, like the Turkish cast-on can be used, and only after a few rounds the first curl will twirl its way into sight. (Ed. Please note that I will always be the first to admit that eyelets and I are not the best of friends. We get along ok these days, but won't be on calling-in-the-middle-of-the-night-to-bewail-the-state-of-the-world terms for a long while yet...)


The 5-stitch bubble edge pattern is also begun in the toe section, and pretty much everything is set-up and ready to go by the beginning of the foot pattern.


The Fish Lips Kiss Heel by Sox Therapist (Ravelry links) is a revelation to me. I won't give too much away, but I've never made such a well-fitting sock before. Like I say on the pattern, I have no affiliation to the designer, but boy, I'm going to be happy I discovered this gem for a very long time! You do have to pay $1 for the heel pattern, but let my voice add to the many others who think it's a real find, and say that it'll be the best sock-related $1 you'll ever spend!

See: that heel is just poetry in yarn!

Where you finish the pattern before the heel will determine where the curls start at the back. I wanted the curl there to appear like the first one in the toe (whether it spins clockwise, or anticlockwise is also determined by where you finished before the heel, and which foot you're working on) without the connection section. It's basically the same round as you'd work on the front, but without the extra yo and decrease to the side that joins one curl up with the next one.


(Note that for my Namolio version I actually used an afterthought/peasant heel, as I didn't want to disturb the colour journey up the sock!)

Once you're ready to start the cuff, there's a small transition section, then it's a simple matter to complete. I bound-off with another new-to-me bind-off: Jeny's Surprisingly Stretchy Cast-Off (this links to a YouTube video, but there seems to be quite a lot of variants to be found online) and was very pleased with the results!

So, there you have it - my tribute to a Hollywood star, and the drink named after her! And you too can make your very own tribute by clicking right HERE and you'll be whisked off to the Ravelry pattern page, complete with its own linky-loos!

Or, you can click right here on this little button to go straight to the paypal page, because who wants to waste time clicking over to Rav, when you can have this pattern RIGHT NAO!!!


And for only €3!! (Plus VAT, natch!)

Go on, you know you want to! :D


Sunday, 22 February 2015

Coffee To Go

caffè latte shawlette by yours truly
ice yarns angora design in 'brown shades'
ice yarns angora premium in 'ivory'
A caffè latte is more than just a milky coffee, even if it is exactly that when translated from the Italian!  But if you're a coffee drinker, well, it's much more that that; it's coffee heaven!

To the Italians, a caffè latte is a brew made at home for breakfast, which would be accompanied by one of their many delicious sweet pastries, but to those of us brought up more on coffee-shop coffee than home-made coffee from a mokapot, then, mmm-mmm, lattes are a staple for day-long caffeination!

I find watching a barista steam milk and gently pour it into an espresso, then add some latte art on the top in the form of a latte-are rosetta (or fern motif) just the right balance of relaxing viewing to counteract the caffeine shot about to hit!  Plus you have the added bonus of the extra yummy tasty coffee treats you can get; just by adding flavoured syrup you can be in caramel latte heaven!  Or pumpkin spice heaven! Or gingerbread latte heaven (my personal coffee cloud 9)!  

So, taking my favourite hot beverage as inspiration, the Caffè Latte shawlette has a latte rosetta edge, with lacy, frothy steamed milk:


a cabled hit of coffee bean:


with a short-row body of caffeine heaven, finishing with a simple eyelet edge - that bit of creamy froth that's always left in the bottom of your cup:


But really it's worked from the short edge of the latte strip using 3 balls of yarn at a time, and when I say simple intarsia, I mean simple!  So simple that this was my first attempt at working the technique!

The rosetta, froth, coffee bean cable, and more froth were all worked together in a long strip:


then bound-off to one stitch, turned 90 degrees and then picked-up lengthwise (please excuse the unfocussed photo):


and the body of the shawlette was worked in good old stockinette stitch, with the unsupped eyelet froth to finish!

You have a choice with the transfer of the contrast colour (I used the ivory as my contrast, the brown mix as the main colour) for the body of the shawl - you can do as I did and have a highlight ivory purl edge between both sections, which is worked in staggered lines (you can see it clearly in the first photo), or there are instructions for a pure stockinette changeover.  Both are pleasing to the eye in their own lovely way!


But where, I hear you ask, can we find such a tasty, tasty pattern?  Never fear, Ravelry and Loveknitting are here!  The main pattern page on Ravelry is open to ALL whether you are a member or not, and you can either click the buy-it-now link on the page, or you can click on the handy button below!  
Now, if you've read my last blog post, you'll know that payment will be a bit different for the next few months, so depending on where you are, you'll either find yourself going straight to the PayPal page as of old, or you'll find yourself at a Loveknitting page, and through that you'll be directed to PayPal. In the end, it's all still PayPal, just different ways of getting there.  There may be a slight delay for the link to work through loveknitting.com for EU buyers, but please check back.

But Red, I hear you ask again, how much are you charging for such deliciousness? Well...  this is where it gets complicated.  Give or take a few pennies/cents either way, I will be charging €4 for this lovely shawlette pattern... 

Normally with my new patterns, I like to offer you all a deal, money off the pattern with a special code, for example, but because of the new system of selling, it's not something I can do just now.  SO INSTEAD I'm taking 25% off the price for the next 2 weeks!  Yes indeed, until the 8th of March you'll find this delight available for the introductory price of €3 (or the monetary equivalent of your country!)

Grab it while it's hot!